tkinter -- button1
发布时间:2018-05-30 17:13:25编辑:Run阅读(4963)
Button 功能触发事件
一个简单的button应用
示例:
import tkinter as tk

# 定义button的回调函数
def py3study():
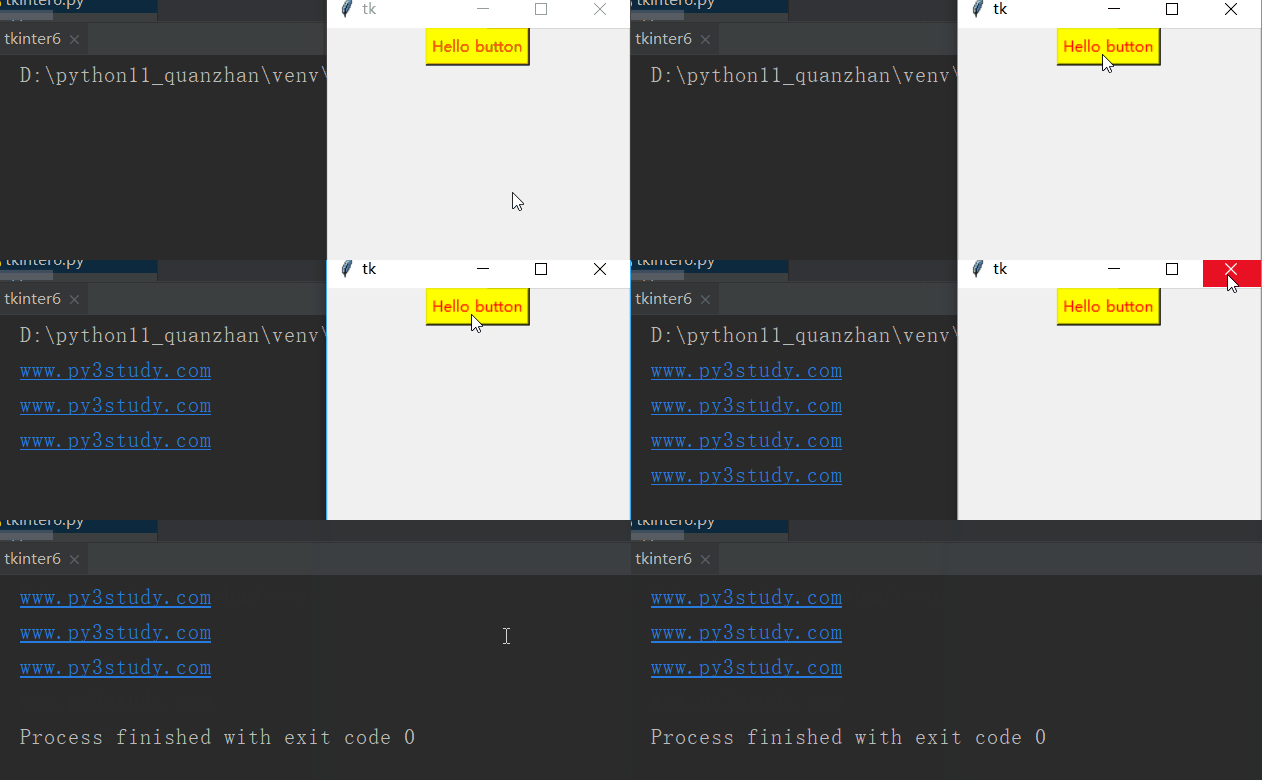
    print('www.py3study.com')

root = tk.Tk()  # 初始化Tk
# bg为button背景色, fg为button字体颜色
tk.Button(root, bg='yellow', fg='red', text='Hello button', command=py3study).pack()

# 进入消息循环
root.mainloop()
效果:
测试 Button 的 relief 属性
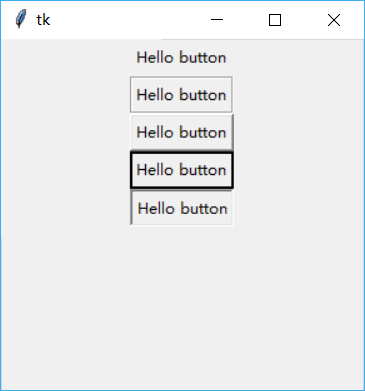
Tkinter Relief styles: 构件的浮雕式是指某些模拟的3-D周围的部件外的影响
下面是可能的提供救济属性可以使用的常数列表
FLAT 平面
RAISED 上调
SUNKEN 凹陷
GROOVE 槽
RIDGE 岭
示例:
注意relief='flat' 必须用引号引起来且需要小写
import tkinter as tk

root = tk.Tk()  # 初始化Tk

tk.Button(root, text='Hello button', relief='flat').pack()
tk.Button(root, text='Hello button', relief='groove').pack()
tk.Button(root, text='Hello button', relief='raised').pack()
tk.Button(root, text='Hello button', relief='solid').pack()
tk.Button(root, text='Hello button', relief='sunken').pack()

# 进入消息循环
root.mainloop()
效果:
与Label一样,Button也可以同时显示文本和图像,也可以设置颜色使用
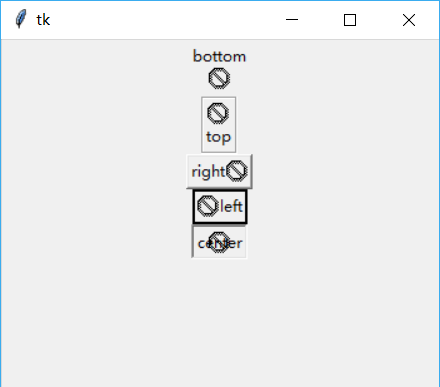
属性compound
示例:
bottom 图标在文字下面显示
top 图标在文字上面显示
right 图标在文字后边显示
left 图标在文字左边显示
center 图标覆盖文字显示
示例:
import tkinter as tk

root = tk.Tk()  # 初始化Tk
# 也可以设置颜色,bg为button背景色, fg为button字体颜色
tk.Button(root, text='bottom', compound='bottom', bitmap='error', relief='flat').pack()
tk.Button(root, text='top', compound='top',bitmap='error',relief='groove').pack()
tk.Button(root, text='right', compound='right',bitmap='error',relief='raised').pack()
tk.Button(root, text='left', compound='left',bitmap='error',relief='solid').pack()
tk.Button(root, text='center', compound='center',bitmap='error',relief='sunken').pack()

# 进入消息循环
root.mainloop()
效果:
控件焦点问题:
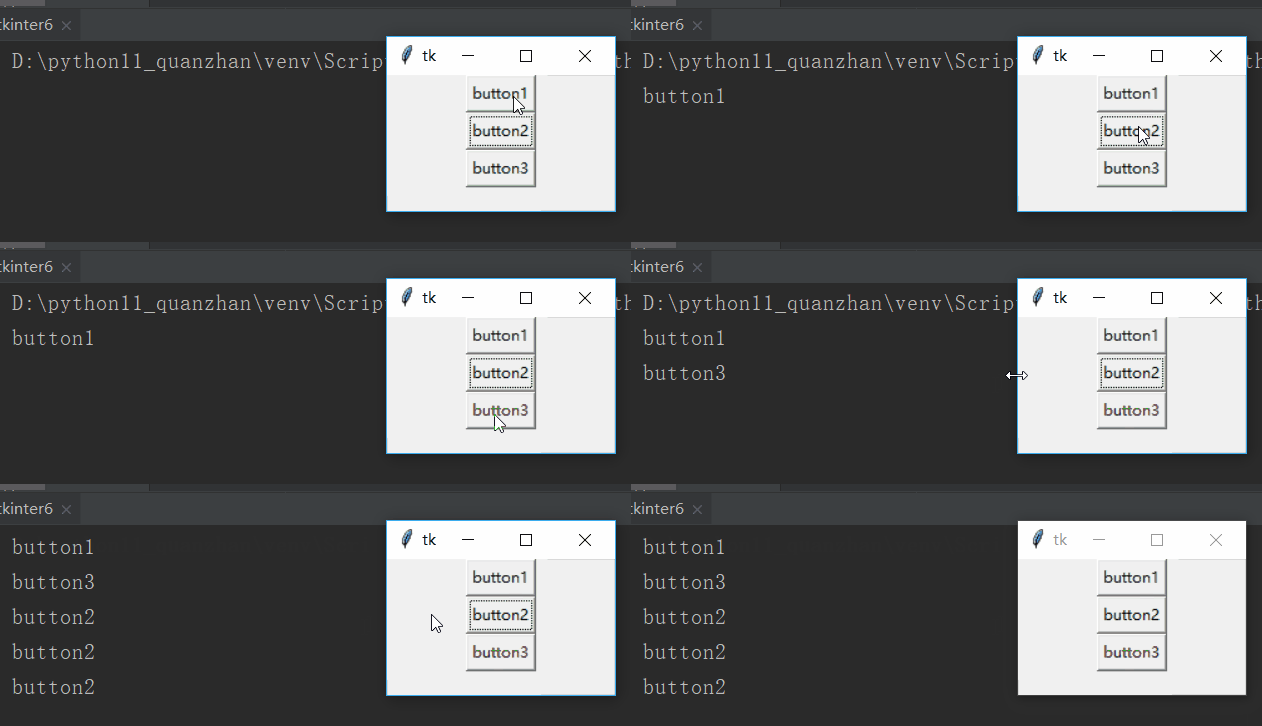
创建三个Button,各自对应回调函数;将第二个Button设置焦点,程序运行是按“Enter”判断程序的打印结果
bind方法,它建立事件与回调函数(相应函数)之间的关系,每当产生<Return>事件后,程序便自动的调用 cb2,与 cb1,cb3不同的是,它本身还带有一个参数----event,这个参数传递响应事件的信息
代码:
import tkinter as tk

def cb1():
    print('button1')

def cb2(event):  # 接收一个参数event
    print('button2')

def cb3():
    print('button3')

root = tk.Tk()

b1 = tk.Button(root, text='button1', command=cb1)
b2 = tk.Button(root, text='button2')
# bind方法,它建立事件与回调函数(相应函数)之间的关系,
# 每当产生<Return>事件后,程序便自动的调用 cb2,与 cb1,cb3不同的是,
# 它本身还带有一个参数----event,这个参数传递响应事件的信息
b2.bind("<Return>", cb2)
b3 = tk.Button(root, text='button3', command=cb3)
b1.pack()
b2.pack()
b3.pack()

# focus_set获取b2的返回值
b2.focus_set()
root.mainloop()
效果:--> button2 按回车键触发
示例2:
import tkinter as tk

def printEventInfo(event):
    print('event.time = {}'.format(event.time))
    print('event.type = {}'.format(event.type))
    print('event.widgetid = {}'.format(event.widget))
    print('event.keysymbol = {}'.format(event.keysym))

root = tk.Tk()
bt = tk.Button(root, text='Infomation')
bt.bind("<Return>", printEventInfo)
bt.pack()
bt.focus_set()
root.mainloop()
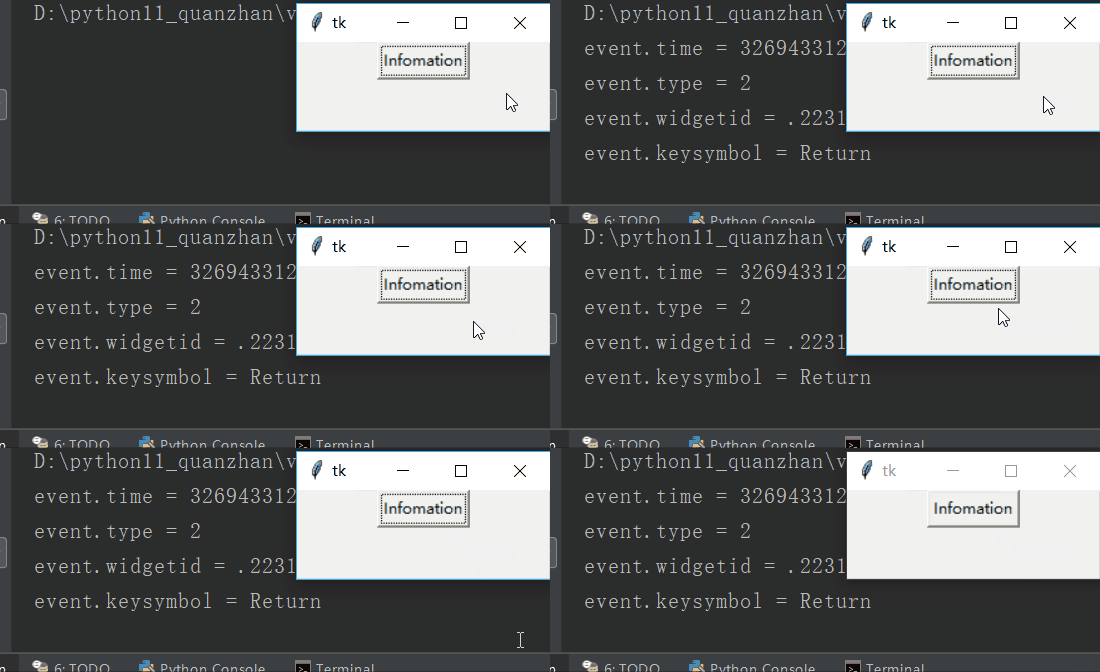
效果:
上一篇: tkinter -- 文本的多行显示
下一篇: tkinter -- button2
- openvpn linux客户端使用
52137
- H3C基本命令大全
52025
- openvpn windows客户端使用
42225
- H3C IRF原理及 配置
39071
- Python exit()函数
33584
- openvpn mac客户端使用
30537
- python全系列官方中文文档
29181
- python 获取网卡实时流量
24196
- 1.常用turtle功能函数
24100
- python 获取Linux和Windows硬件信息
22435
- LangChain1.0-Agent-部署/上线(开发人员必备)
228°
- LangChain1.0-Agent-Spider实战(爬虫函数替代API接口)
259°
- LangChain1.0-Agent(进阶)本地模型+Playwright实现网页自动化操作
271°
- LangChain1.0-Agent记忆管理
257°
- LangChain1.0-Agent接入自定义工具与React循环
289°
- LangChain1.0-Agent开发流程
264°
- LangChain1.0调用vllm本地部署qwen模型
293°
- LangChain-1.0入门实践-搭建流式响应的多轮问答机器人
293°
- LangChain-1.0入门实战-1
298°
- LangChain-1.0教程-(介绍,模型接入)
308°
- 姓名:Run
- 职业:谜
- 邮箱:383697894@qq.com
- 定位:上海 · 松江
