requests-html爬虫利器介绍
发布时间:2019-05-11 15:30:14编辑:Run阅读(11037)
爬虫用的最多的包无非就是requests, urllib,然后再利用pyquery或者bs4,xpath再去整理提取需要的目标数据。
在requests-html里面只需要一步就可以完成而且可以直接进行js渲染.
requests的作者Kenneth Reitz 开发的requests_html是基于现有的框架 PyQuery、Requests、lxml、beautifulsoup4等库进行了二次封装,这里是github地址:https://github.com/kennethreitz/requests-html
安装
pip3 install requests-html
基础用法:
from requests_html import HTMLSession

session = HTMLSession()
taobao = session.get('https://www.taobao.com/')
# 获取状态码
status_code = taobao.status_code
# 获取cookies信息
cookies = taobao.cookies
# 获取网页内的所有链接,返回set类型
link_list = taobao.html.links
# 获取页面上所欲偶的链接,以绝对路径的方式,返回set类型
ab_link_list = taobao.html.absolute_links获取元素,request-html支持CSS选择器和XPATH两种语法来选取HTML元素。
requests-html CSS选择器语法,它需要使用html的find函数,html.find,
css选择器语法:http://www.w3school.com.cn/cssref/css_selectors.asp
示例代码:
from requests_html import HTMLSession

session = HTMLSession()
r = session.get('https://www.py3study.com/')
title_list = r.html.find('.index_arc_item h4 a')
for i in title_list:
    print(i.text)
返回信息:

通过css选择器选取一个Element对象
from requests_html import HTMLSession

session = HTMLSession()
r = session.get('https://www.python.org/')
# 通过css选择器选取一个Element对象
node = r.html.find('#about', first=True)
# 获取一个Element对象内的文本信息
node_text = node.text

# 获取一个Element对象的所有attributes
node_attes = node.attrs

# 渲染出一个Element对象的HTML内容
node_html = node.html

# 获取Element对象内的特定子ELement对象,返回列表
node_list = node.find('a')
requests-html XPATH语法,需要html的xpath函数,html.xpath
xpath选择器语法:http://www.w3school.com.cn/xpath/index.asp
示例代码:
from requests_html import HTMLSession

session = HTMLSession()
r = session.get('https://www.py3study.com/')
# 找到所有文章
title_list = r.html.xpath("//h4[@class='title']/a/text()")
返回信息:

重点!!!requests-html支持JavaScript
访问猫眼实时票房页面:https://piaofang.maoyan.com/dashboard
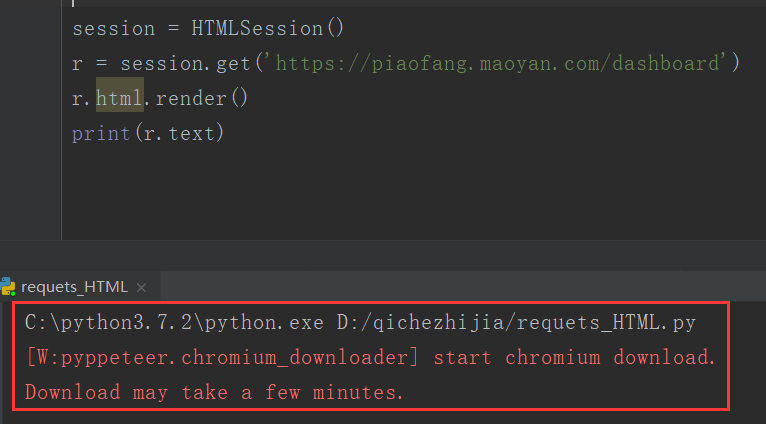
示例代码:当你第一次调用render()方法时,代码将会自动下载Chromium,并保存在你的家目录下(如:~/.pyppeteer/),只会下载这一次(需要梯子才能下载)
from requests_html import HTMLSession

session = HTMLSession()
r = session.get('https://piaofang.maoyan.com/dashboard')
r.html.render()
print(r.text)
返回信息:

render函数还有一些参数,介绍一下(这些参数有的还有默认值,直接看源代码方法参数列表即可):
- retries: 加载页面失败的次数
- script: 页面上需要执行的JS脚本(可选)
- wait: 加载页面钱的等待时间(秒),防止超时(可选)
- scrolldown: 页面向下滚动的次数
- sleep: 在页面初次渲染之后的等待时间
- reload: 如果为假,那么页面不会从浏览器中加载,而是从内存中加载
- keep_page: 如果为真,允许你用r.html.page访问页面
比如说简书的用户页面上用户的文章列表就是一个异步加载的例子,初始只显示最近几篇文章,如果想爬取所有文章,就需要使用scrolldown配合sleep参数模拟下滑页面,促使JS代码加载所有文章
还有正在开发的智能分页系统这里还没有完善不过多介绍
requests-html自定义用户代理
有些网站会使用UA来识别客户端类型,有时候需要伪造UA来实现某些操作
from requests_html import HTMLSession
from pprint import pprint
import json
session = HTMLSession()
r = session.get('http://httpbin.org/get')
pprint(json.loads(r.html.html))
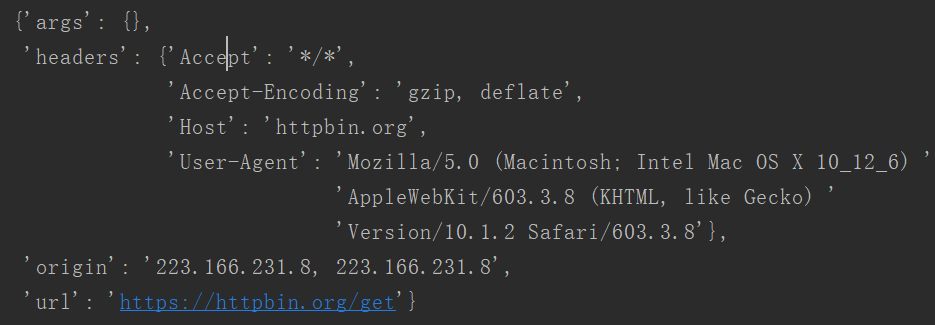
返回信息:

requests-html更换user-agent,访问
from requests_html import HTMLSession
from pprint import pprint
import json
session = HTMLSession()
ua = 'Mozilla/5.0 (Windows NT 10.0; Win64; x64; rv:62.0) Gecko/20100101 Firefox/62.0'
r = session.get('http://httpbin.org/get', headers={'user-agent': ua})
pprint(json.loads(r.html.html))
返回信息,可以看到user-agent已经变了

requests-html模拟表单登陆
HTMLSession带了一整套的HTTP方法,包括get、post、delete等,对应HTTP中各个方法.
from requests_html import HTMLSession
from pprint import pprint
import json
session = HTMLSession()
r = session.post('http://httpbin.org/post', data={'username': 'root', 'passwd': 'root'})
pprint(json.loads(r.html.html))
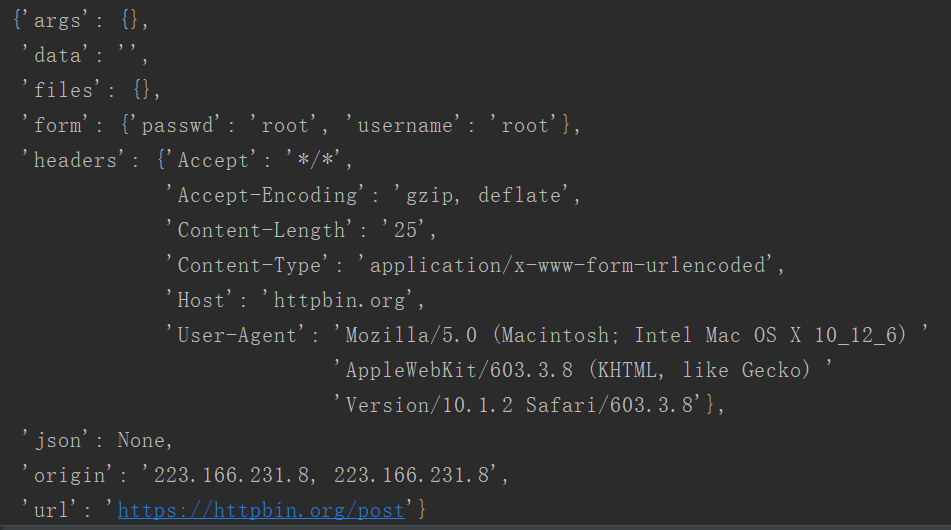
返回信息:

requests-html更多使用方法查看:https://cncert.github.io/requests-html-doc-cn/#/?id=user_agent
上一篇: 没有了
- openvpn linux客户端使用
52029
- H3C基本命令大全
51886
- openvpn windows客户端使用
42123
- H3C IRF原理及 配置
38968
- Python exit()函数
33468
- openvpn mac客户端使用
30421
- python全系列官方中文文档
29050
- python 获取网卡实时流量
24081
- 1.常用turtle功能函数
23997
- python 获取Linux和Windows硬件信息
22344
- LangChain1.0-Agent-部署/上线(开发人员必备)
49°
- LangChain1.0-Agent-Spider实战(爬虫函数替代API接口)
95°
- LangChain1.0-Agent(进阶)本地模型+Playwright实现网页自动化操作
121°
- LangChain1.0-Agent记忆管理
111°
- LangChain1.0-Agent接入自定义工具与React循环
127°
- LangChain1.0-Agent开发流程
116°
- LangChain1.0调用vllm本地部署qwen模型
145°
- LangChain-1.0入门实践-搭建流式响应的多轮问答机器人
163°
- LangChain-1.0入门实战-1
162°
- LangChain-1.0教程-(介绍,模型接入)
167°
- 姓名:Run
- 职业:谜
- 邮箱:383697894@qq.com
- 定位:上海 · 松江
