Selenium Chrome驱动安装(linux系统)
发布时间:2020-10-27 13:07:02编辑:admin阅读(5318)
一、概述
一般Selenium是在windows系统跑的,但是由于性能问题,需要在linux服务器中运行,效率更高。
这里以centos 7.6系统来演示,如何一步步安装。
二、安装Chrome
下载
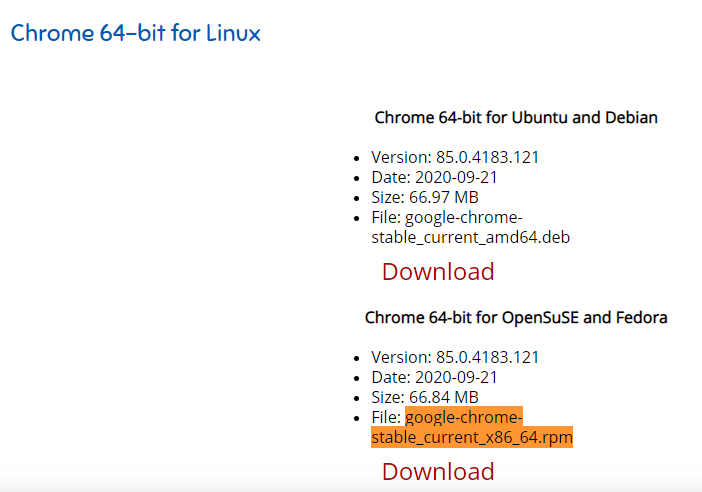
访问下载页面:https://www.chrome64bit.com/index.php/google-chrome-64-bit-for-linux

由于是centos 7.6系统,需要下载google-chrome-stable_current_x86_64.rpm,点击Download下载。
如果你是ubuntu系统,需要上面的deb文件。
下载完成后,将rpm文件上传到linux服务器。
安装Chrome
yum install -y google-chrome-stable_current_x86_64.rpm
安装必应的库
yum install -y mesa-libOSMesa-devel gnu-free-sans-fonts wqy-zenhei-fonts
查看版本
# google-chrome --versionGoogle Chrome 85.0.4183.121
可以看到版本为:85.0.4183.121
安装 chromedriver
访问淘宝源:https://npm.taobao.org/mirrors/chromedriver

由于我安装的版本是:85.0.4183.121,那么大版本对应的是85.0.4183。从上图中,可以看到3个。
但是小版本是121,上面并没有。所以,我只能选择较大的一个,也就是87
进入页面后,下载文件chromedriver_linux64.zip

将文件上传到linux服务器中,解压。解压之后,会得到一个文件chromedriver,它就是浏览器驱动了。
将它copy到/usr/bin目录中,命令如下:
unzip chromedriver_linux64.zip
cp chromedriver /usr/bin/
三、测试
由于linux已经编译安装好了python3,安装selenium模块
pip3 install selenium
编写测试脚本,访问百度
from selenium import webdriver

option = webdriver.ChromeOptions()
# 无头模式
option.add_argument('headless')
# 沙盒模式运行
option.add_argument('no-sandbox')
# 大量渲染时候写入/tmp而非/dev/shm
option.add_argument('disable-dev-shm-usage')
# 指定驱动路径
browser = webdriver.Chrome('/usr/bin/chromedriver',options=option)
# 访问百度
browser.get('http://www.baidu.com/')
# 打印标题
print(browser.title)
# 关闭浏览器
browser.quit()
执行脚本,输出:
百度一下,你就知道
注意:这里只是打印了标题,如果需要打印整个网页,可以使用
print(browser.page_source)
本文参考链接:
https://www.cnblogs.com/han20180705/p/10193753.html
https://cloud.tencent.com/developer/article/1404558
- openvpn linux客户端使用
52055
- H3C基本命令大全
51920
- openvpn windows客户端使用
42148
- H3C IRF原理及 配置
38994
- Python exit()函数
33494
- openvpn mac客户端使用
30445
- python全系列官方中文文档
29081
- python 获取网卡实时流量
24110
- 1.常用turtle功能函数
24018
- python 获取Linux和Windows硬件信息
22369
- LangChain1.0-Agent-部署/上线(开发人员必备)
119°
- LangChain1.0-Agent-Spider实战(爬虫函数替代API接口)
152°
- LangChain1.0-Agent(进阶)本地模型+Playwright实现网页自动化操作
163°
- LangChain1.0-Agent记忆管理
148°
- LangChain1.0-Agent接入自定义工具与React循环
174°
- LangChain1.0-Agent开发流程
161°
- LangChain1.0调用vllm本地部署qwen模型
182°
- LangChain-1.0入门实践-搭建流式响应的多轮问答机器人
187°
- LangChain-1.0入门实战-1
186°
- LangChain-1.0教程-(介绍,模型接入)
200°
- 姓名:Run
- 职业:谜
- 邮箱:383697894@qq.com
- 定位:上海 · 松江
