nginx+php-fpm docker镜像合二为一
发布时间:2020-05-28 16:11:53编辑:admin阅读(4762)
一、概述
在上一篇文章介绍了nginx+php-fpm,链接如下:
https://www.cnblogs.com/xiao987334176/p/12918413.html
nginx和php-fpm是2个独立的镜像,在实际环境部署过程中,发现配置比较麻烦,排错比较耗费实际。
因此,需要将nginx和php-fpm 这2个镜像合并为一个。
二、nginx+php-fpm封装
目录结构
由于crunchgeek/php-fpm:7.3-r7 镜像比较大,有1.08GB。
因此需要使用alpine:3.11重新封装才行。
在dockerhub上面,php已经有官方的镜像了,php:7.3-fpm-alpine3.11。
由于项目php7cms依赖于组件mysqli,因此需要额外安装才行。
新建目录/opt/alpine_nginx_php7.3,结构如下:
./
├── default.conf
├── dockerfile
├── index.html
├── repositories
└── run.sh
default.conf
server {
  listen 80;
  server_name localhost;

  root /var/www/html;
  index index.html index.htm index.nginx-debian.html;

  location / {
    try_files $uri $uri/ =404;
  }
  location ~ \.php$ {
    fastcgi_pass 127.0.0.1:9000;
    fastcgi_index index.php;
    fastcgi_param SCRIPT_FILENAME $document_root$fastcgi_script_name;
    include fastcgi_params;
  }
}
dockerfile
FROM php:7.3-fpm-alpine3.11
ADD repositories /etc/apk/repositories
ADD default.conf /
ADD index.html /
ADD run.sh /
RUN apk update && apk add nginx && \
    apk add m4 autoconf make gcc g++ linux-headers && \
    docker-php-ext-install pdo_mysql opcache mysqli && \
    mkdir /run/nginx && \
    mv /default.conf /etc/nginx/conf.d && \
    mv /index.html /var/www/html && \
    touch /run/nginx/nginx.pid && \
    chmod 755 /run.sh && \
    apk del m4 autoconf make gcc g++ linux-headers

EXPOSE 80
EXPOSE 9000

ENTRYPOINT ["/run.sh"]
注意:这里我额外安装了pdo_mysql,因为某些php项目用的是这个模块。opcache是用来做性能加速的。
index.html
<!DOCTYPE html>
<html>
<head>
<title>Welcome to nginx!</title>
<style>
    body {
        width: 35em;
        margin: 0 auto;
        font-family: Tahoma, Verdana, Arial, sans-serif;
    }
</style>
</head>
<body>
<h1>Welcome to nginx!</h1>
<p>If you see this page, the nginx web server is successfully installed and
working. Further configuration is required.</p>

<p>For online documentation and support please refer to
<a href="http://nginx.org/">nginx.org</a>.<br/>
Commercial support is available at
<a href="http://nginx.com/">nginx.com</a>.</p>

<p><em>Thank you for using nginx.</em></p>
</body>
</html>
repositories
https://mirrors.aliyun.com/alpine/v3.11/main/
https://mirrors.aliyun.com/alpine/v3.11/community/
这个是阿里云的alpine更新源
run.sh
#!/bin/sh

# 后台启动
php-fpm -D
# 关闭后台启动,hold住进程
nginx -g 'daemon off;'
封装镜像
cd /opt/alpine_nginx_php7.3docker build -t alpine_nginx_php7.3:1 .
查看镜像大小
# docker images|grep alpine_nginx_php7.3
alpine_nginx_php7.3       1                    927ddfbdd027        14 minutes ago      78.4MB
可以看到这个镜像只有78.4MB。
运行镜像
docker run -it --name alpine_nginx_php7.3 -p 80:80 alpine_nginx_php7.3:1 .
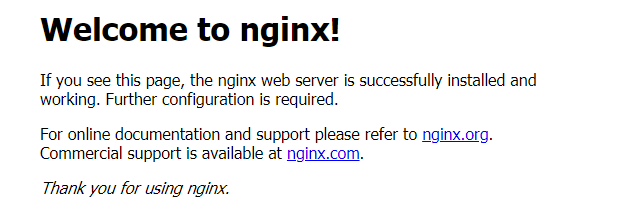
访问首页
http://ip地址/
效果如下:
phpinfo页面
新建test.php
cd /opt/alpine_nginx_php7.3
vi test.php
内容如下:
<?php
   phpinfo();
?>
拷贝到容器中
docker cp test.php alpine_nginx_php7.3:/var/www/html/
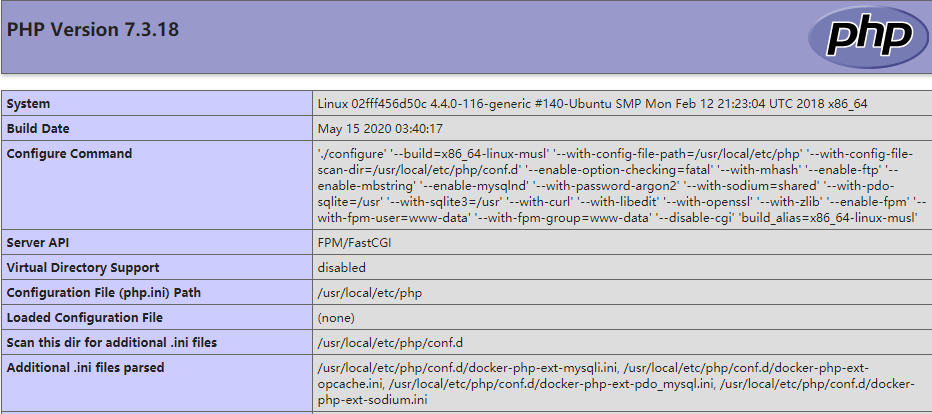
访问test.php
http://ip地址/test.php
效果如下:
三、运行PHP7CMS
下载源代码
源代码下载地址:
http://down.chinaz.com/soft/38829.htm
下载完成后,在windows10电脑中解压。
进入linux系统,创建空目录/opt/php7cms,将解压文件夹PHP7CMS的所有内容上传到/opt/php7cms中。
此时/opt/php7cms目录结构如下:
# tree -L 1
.
├── admin.php
├── api
├── cache
├── config
├── index.php
├── install.php
├── LICENSE
├── php7cms
├── README.md
├── static
├── template
├── uploadfile
├── 安装方法.txt
└── 安装环境.docx
-L 参数表示控制深度,这里只展示第一层。
在此目录新建dockerfile
FROM alpine_nginx_php7.3:1
ADD default.conf /etc/nginx/conf.d
ADD . /var/www/html/PHP7CMS
RUN chown www-data:www-data -R /var/www/html
在此目录新建default.conf
server {
  listen 80;
  server_name localhost;
  root /var/www/html/PHP7CMS;
  index index.php index.html index.htm;

  location ~ \.php$ {
    fastcgi_pass 127.0.0.1:9000;
    fastcgi_index index.php;
    fastcgi_param SCRIPT_FILENAME $document_root$fastcgi_script_name;
    include fastcgi_params;
  }
}
这个文件用来将nginx默认的配置覆盖掉
封装镜像
cd /opt/php7cms
docker build -t php7cms:1 .
运行docker
先将之前运行的nginx_php删除掉,再运行php7cms。否则会端口冲突
docker rm -f alpine_nginx_php7.3
docker run -d -it --restart=always --name php7cms -p 80:80 php7cms:1
由于php7cms依赖于mysql,还得运行一个mysql才行。
mkdir -p /data/mysql/data
docker run -d --name mysql5.7 --restart=always -e MYSQL_ROOT_PASSWORD=abcd@1234  -p 3306:3306 -v /data/mysql/data:/var/lib/mysql mysql:5.7 --character-set-server=utf8mb4 --collation-server=utf8mb4_unicode_ci
新建空的数据库cms
# docker exec -it mysql5.7 /bin/bash
# mysql -u root -pabcd@1234
mysql> create database cms default character set utf8mb4 collate utf8mb4_unicode_ci;
安装向导
我的服务器ip地址为:10.212.20.213
访问安装页面
http://10.212.20.213/install.php
输入数据库连接信息
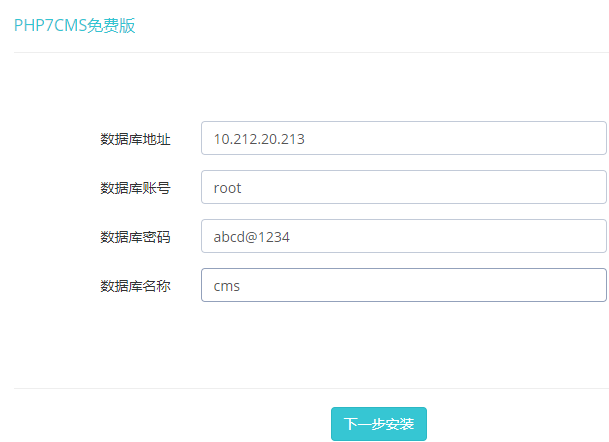
点击下一步后,提示安装完成。

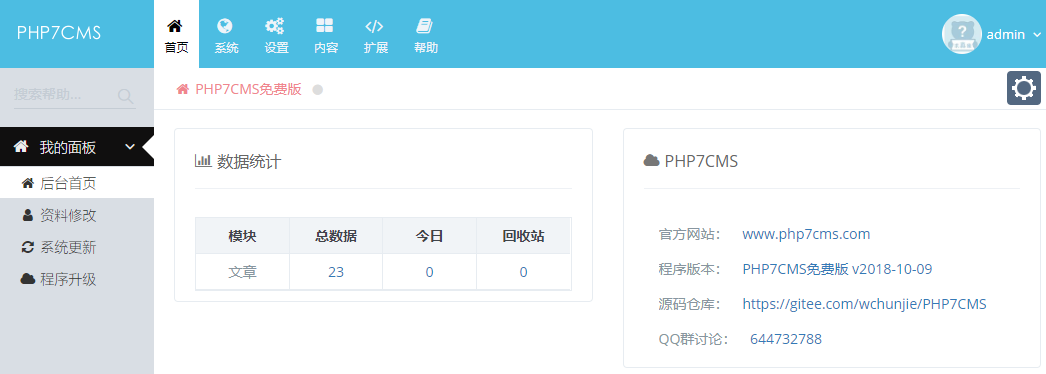
登录后台页面
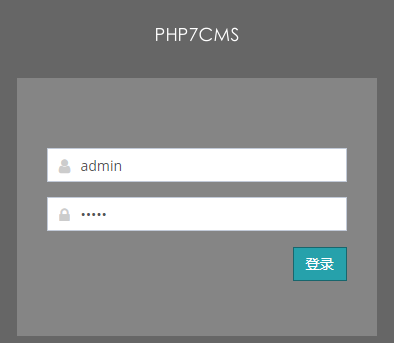
默认用户名和密码都是admin
登录成功后,效果如下:
访问首页
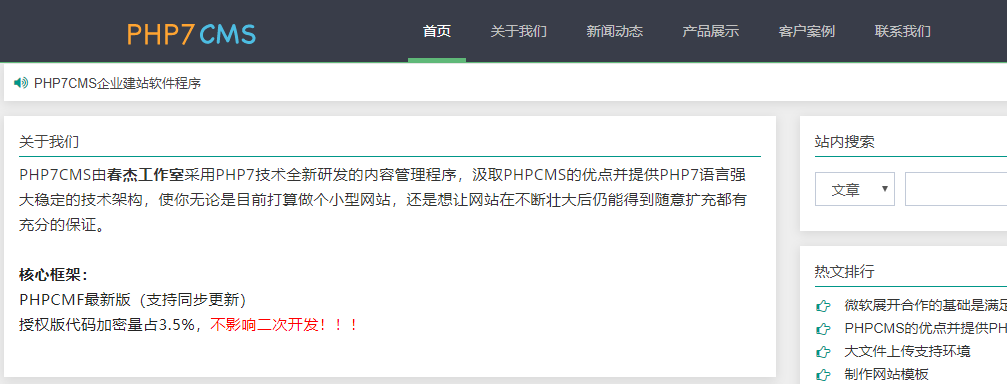
http://10.212.20.213/
效果如下:
下一篇: Rancher管理k8s集群
- openvpn linux客户端使用
52055
- H3C基本命令大全
51920
- openvpn windows客户端使用
42148
- H3C IRF原理及 配置
38994
- Python exit()函数
33494
- openvpn mac客户端使用
30445
- python全系列官方中文文档
29081
- python 获取网卡实时流量
24110
- 1.常用turtle功能函数
24018
- python 获取Linux和Windows硬件信息
22369
- LangChain1.0-Agent-部署/上线(开发人员必备)
119°
- LangChain1.0-Agent-Spider实战(爬虫函数替代API接口)
152°
- LangChain1.0-Agent(进阶)本地模型+Playwright实现网页自动化操作
163°
- LangChain1.0-Agent记忆管理
148°
- LangChain1.0-Agent接入自定义工具与React循环
174°
- LangChain1.0-Agent开发流程
161°
- LangChain1.0调用vllm本地部署qwen模型
182°
- LangChain-1.0入门实践-搭建流式响应的多轮问答机器人
187°
- LangChain-1.0入门实战-1
186°
- LangChain-1.0教程-(介绍,模型接入)
200°
- 姓名:Run
- 职业:谜
- 邮箱:383697894@qq.com
- 定位:上海 · 松江
